SFTP (Secure File Transfer Protocol) is a secure, private protocol for sending files over the internet. You can also securely upload reports on a one-time basis via a manual CSV upload. We resync the entire file and delete rows that are not present in each transfer.
In this guide, you will find instructions for creating a custom report in ADP, including the fields to include for your use case.
Contents
- Create a custom report in ADP
- Add fields to your custom report
- Share your custom report
- Troubleshooting
Create a custom report in ADP
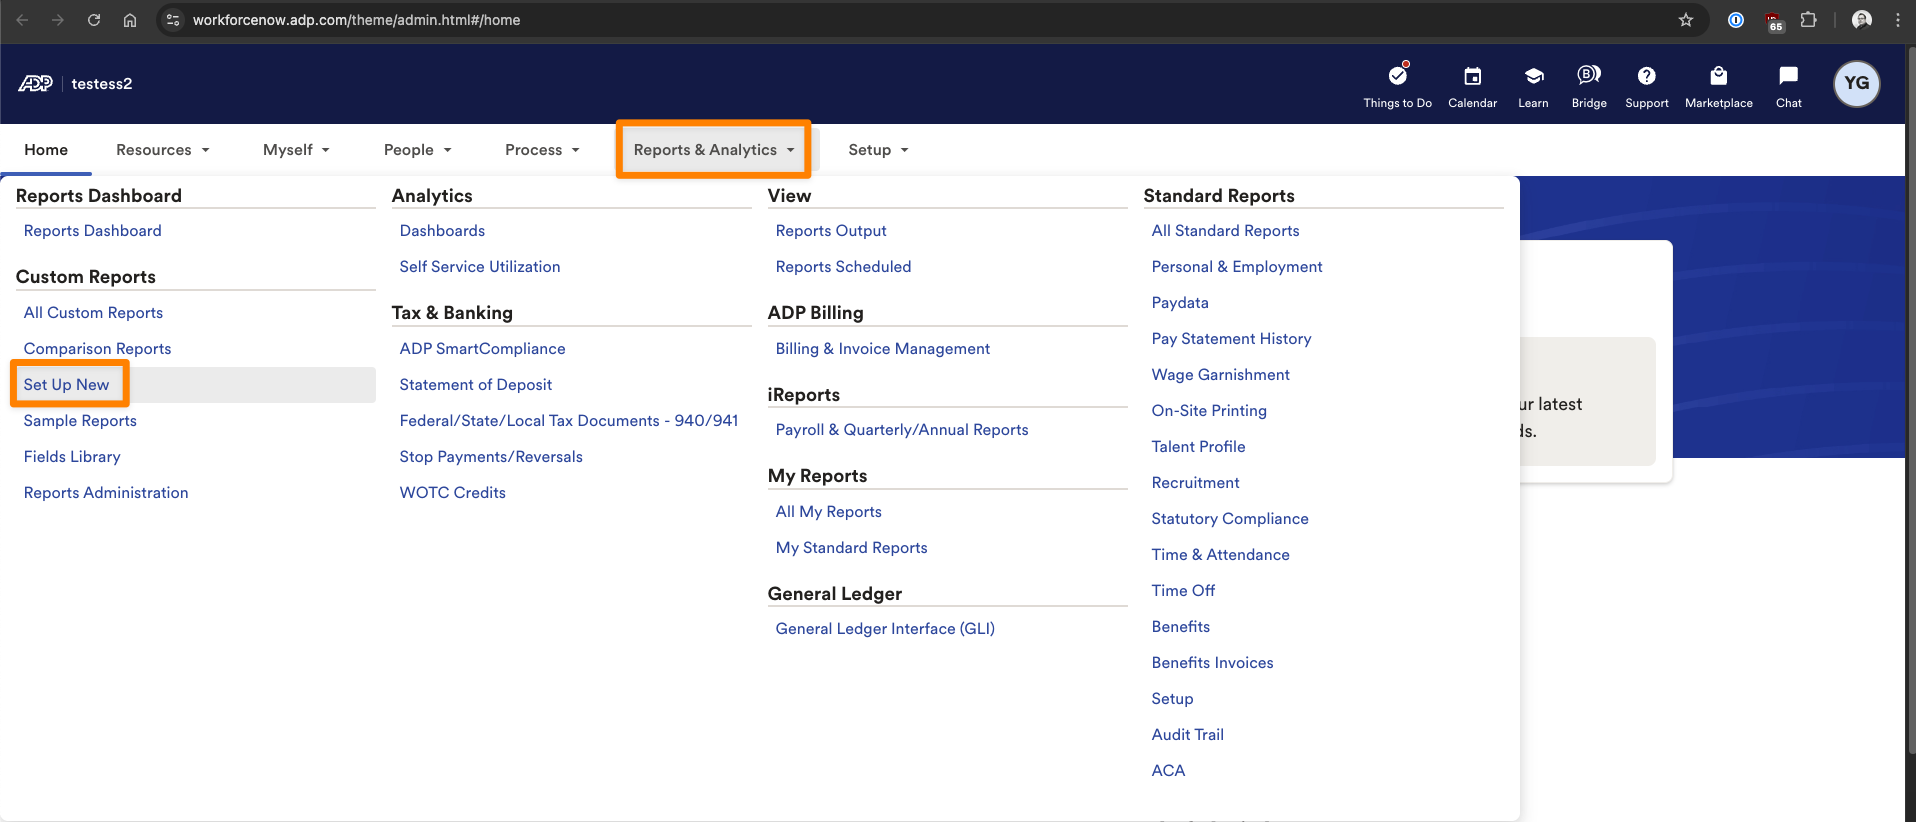
- Log in to ADP and click Reports & Analytics
-
Click Set Up New under the Custom Reports
-
In the Set Up New Report page, set the report title to Employee-Census.csv
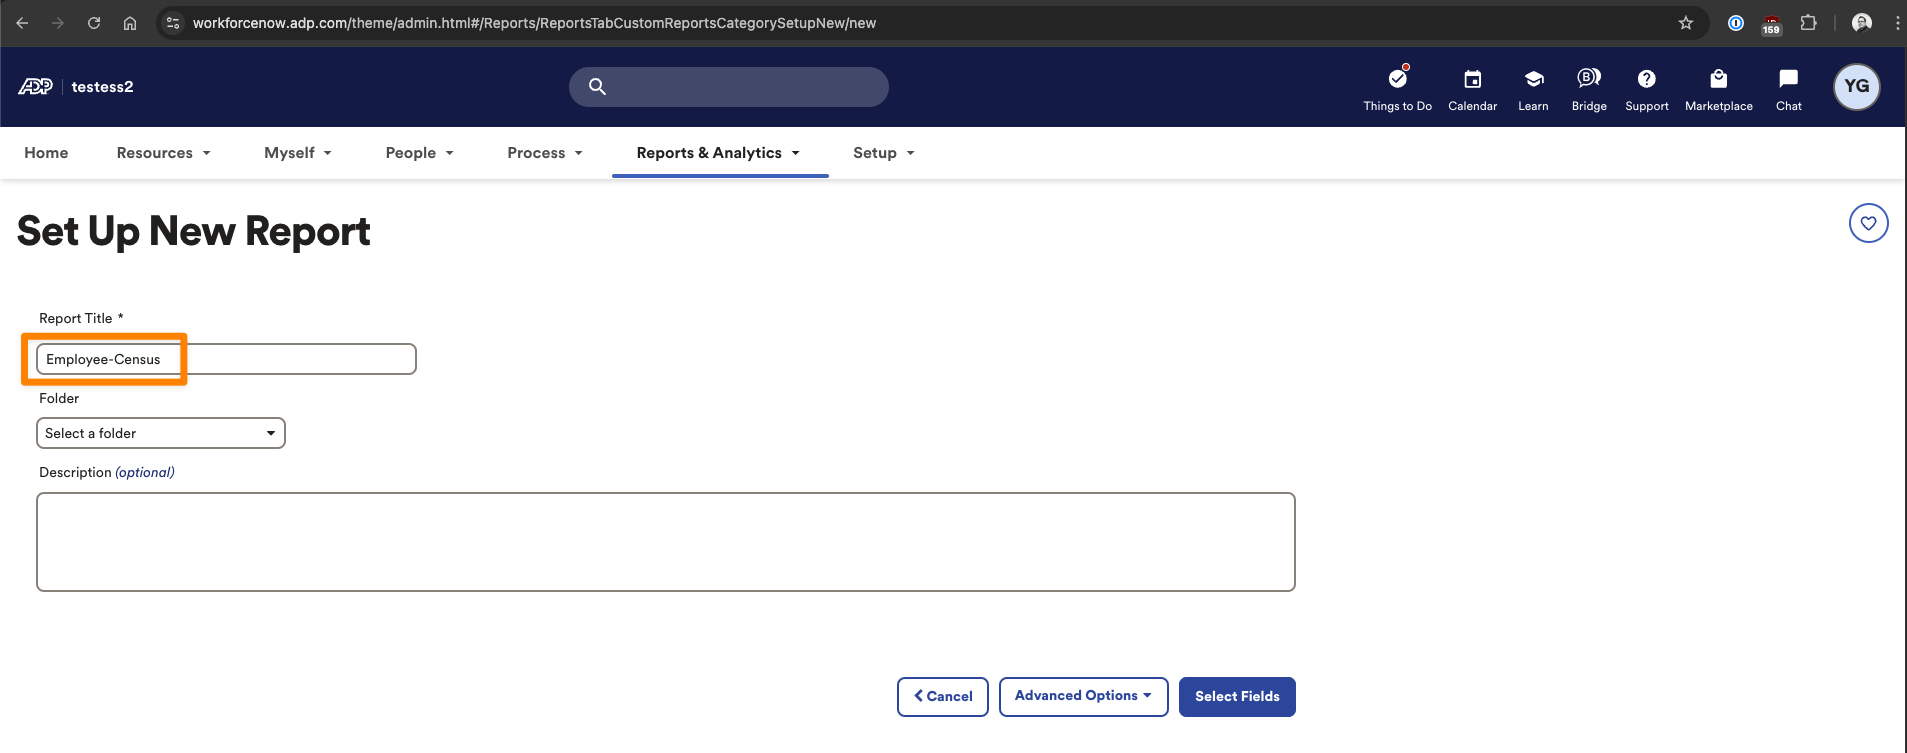
- Then click Select Fields to continue
Add fields to your custom report
Work with your vendor (to whom you are sending this report) to determine which fields are required for the report. You can find all the fields required for your use case in our SFTP Report Template. Please note that the fields must exactly match the format in that file.
To add a field:
- Search for a field name under ADD FIELDS
- Click the + button to add it to the report on the right
- The SFTP Report Template contains the required fields
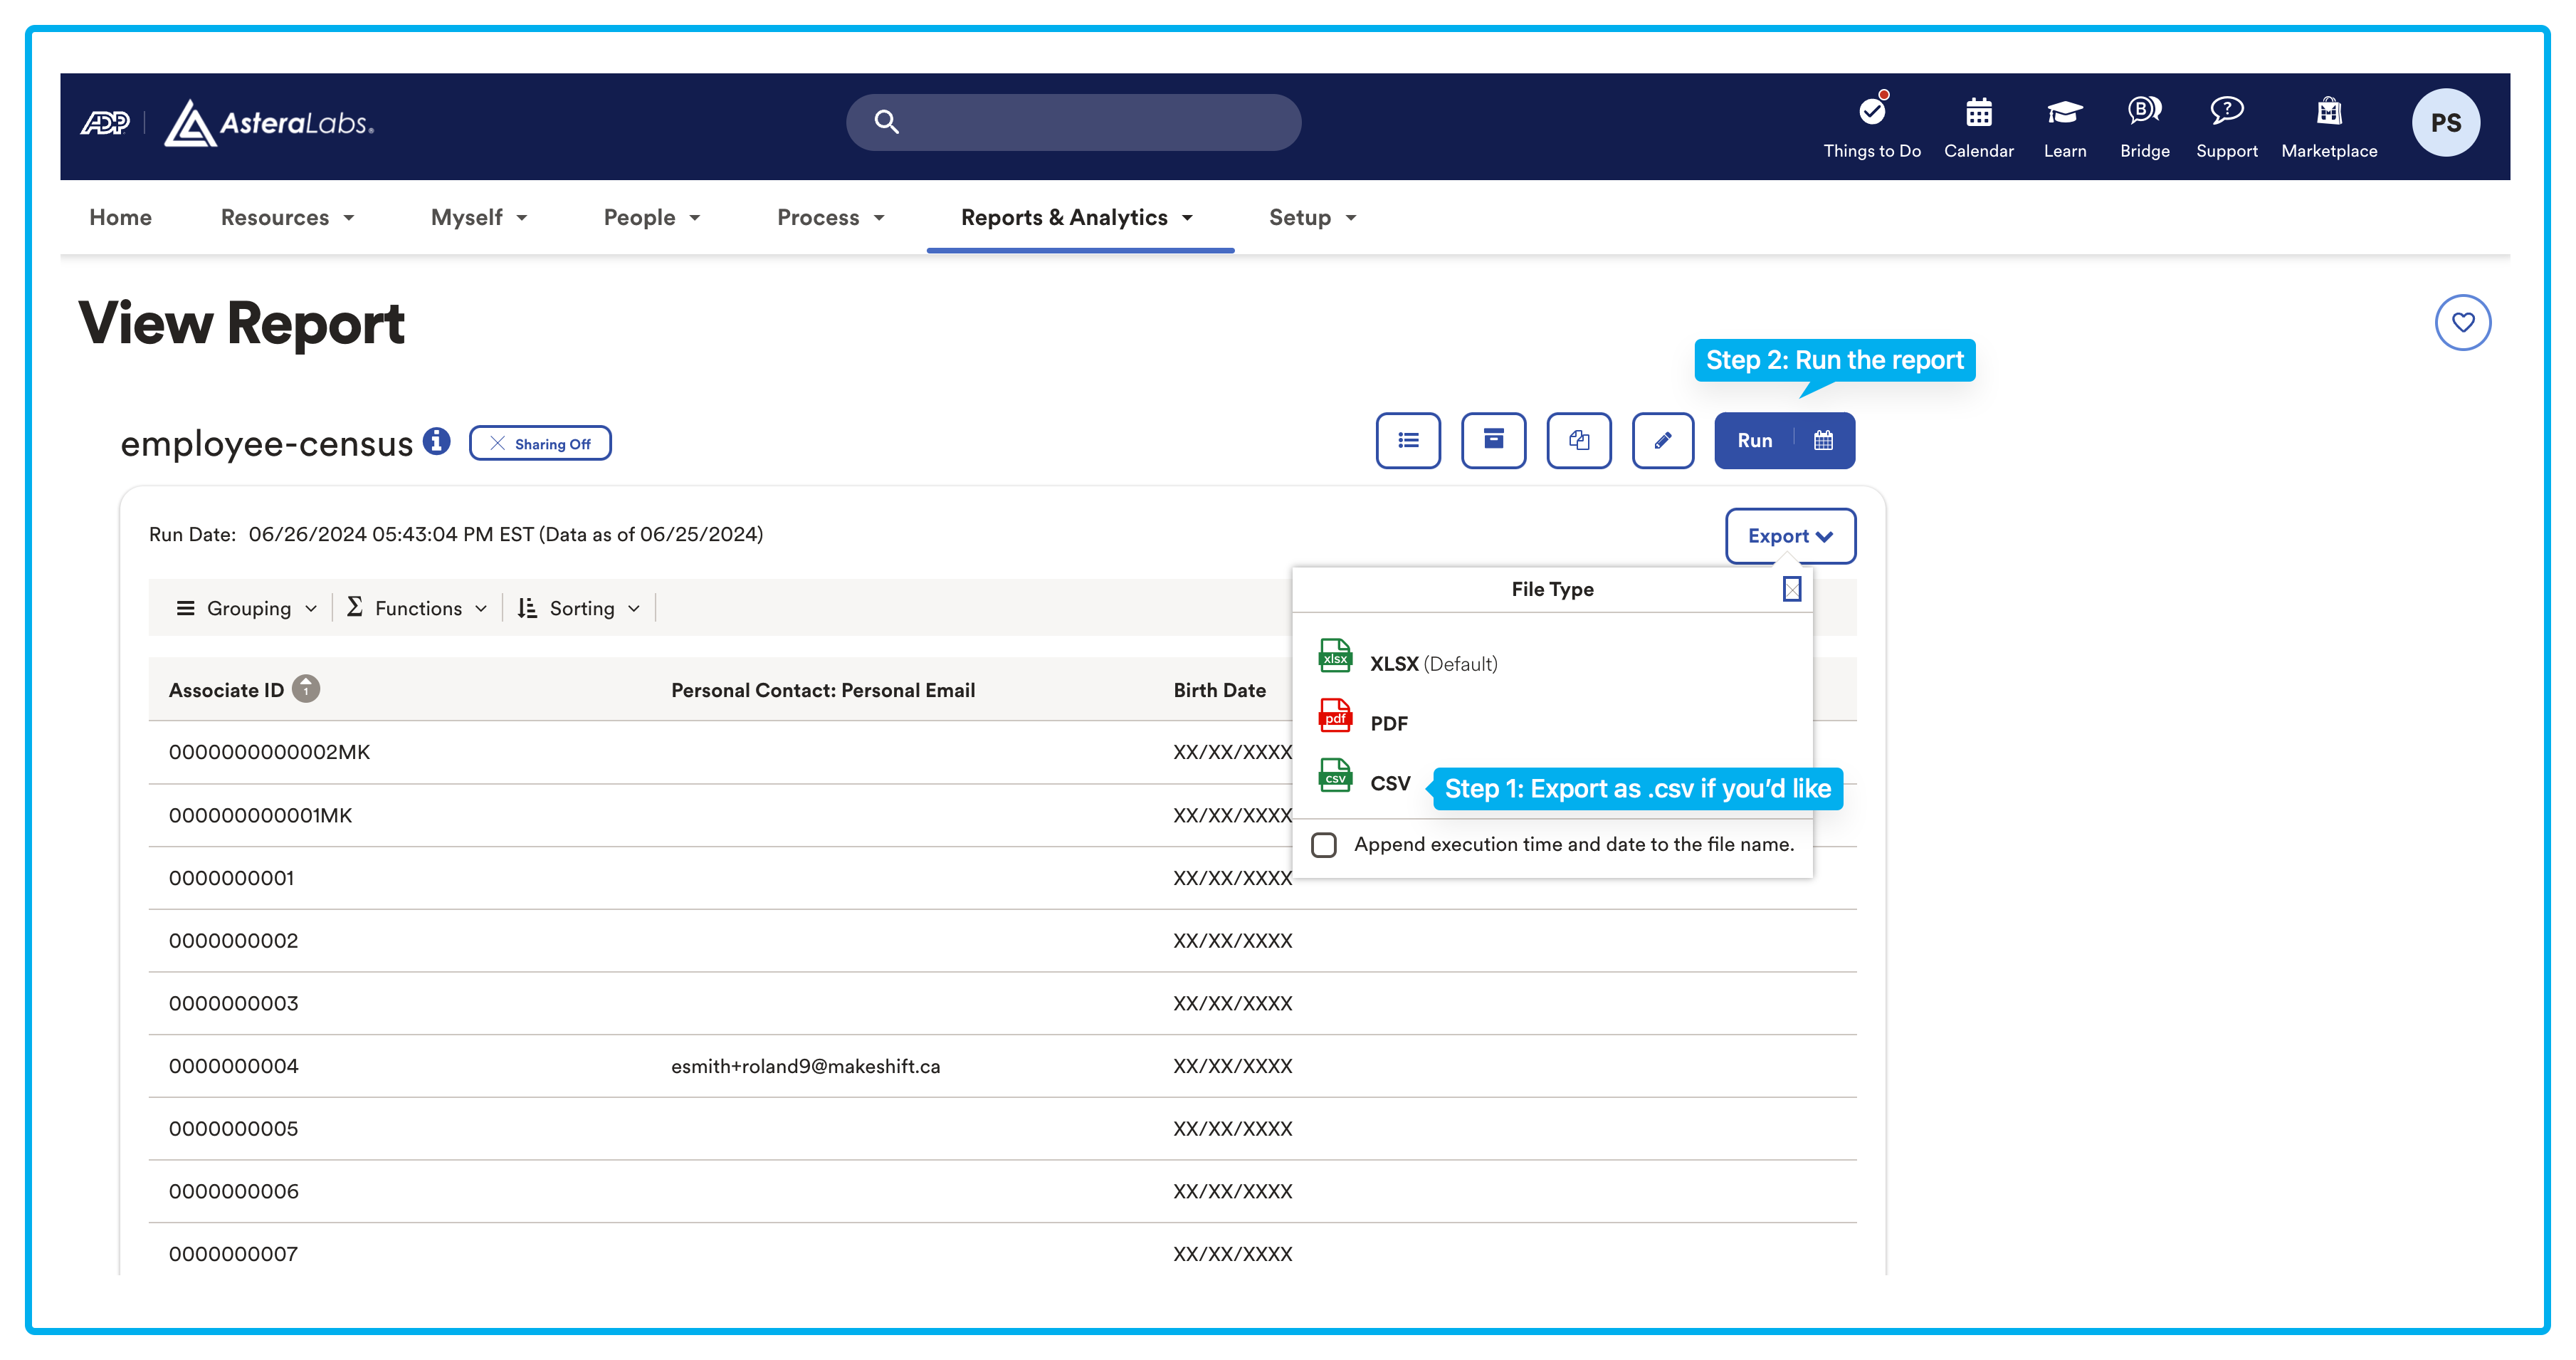
- When you are done, click Save + Run
- This will take you to a View Report screen where you can choose to Export as a CSV
- Click Run to finalize this report
Checkpoint
- Did you name the report Employee-Census.csv? This step is required!
- Did you add the required fields in the SFTP Report Template? These are necessary for the integration setup.
- Sometimes ADP will append a Report Totals to your custom report. If that is the case, please also delete this row.

Share your custom report
There are two ways to send your report that you created above:
- You can use a one-time manual CSV upload.
- You can also schedule a recurring transfer via ADP's Automatic Export Service (AES). Recurring transfers via AES will incur a monthly fee paid to ADP.
One-time manual CSV upload
If you want to update your employee data with a one-time CSV upload, simply download the report you created as a CSV file. Then upload it to your linking modal.
- Open the Integrations page (APIs & Integrations > Integrations) in the ActivTrak App
- Locate the ADP tile and click + Add Instance
- The Time-off Integration via ADP drawer will open. Input the Instance Name. Authenticate the integration by connecting to ADP.
- In the pop-up window, click the I am an admin button. Then click One-time manual CSV upload on the next screen.
- Upload your file on the next screen and click Next.
Recurring report transfers using Automatic Export Service
To automatically send your report on a recurring basis, contact your ADP representative. They will charge a recurring fee to set up report automation that can be used across one or multiple reports. For more information on pricing, please refer to your ADP representative. Charges may vary, but anecdotally, we have heard prices range from $30 to $50/month.
To set up the automation, you'll need to complete a Statement of Work with ADP to initiate the recurring file transfers (see the example below). Once finalized, ADP will apply the automation to the custom report you previously created. The process typically takes 3-4 weeks to complete.
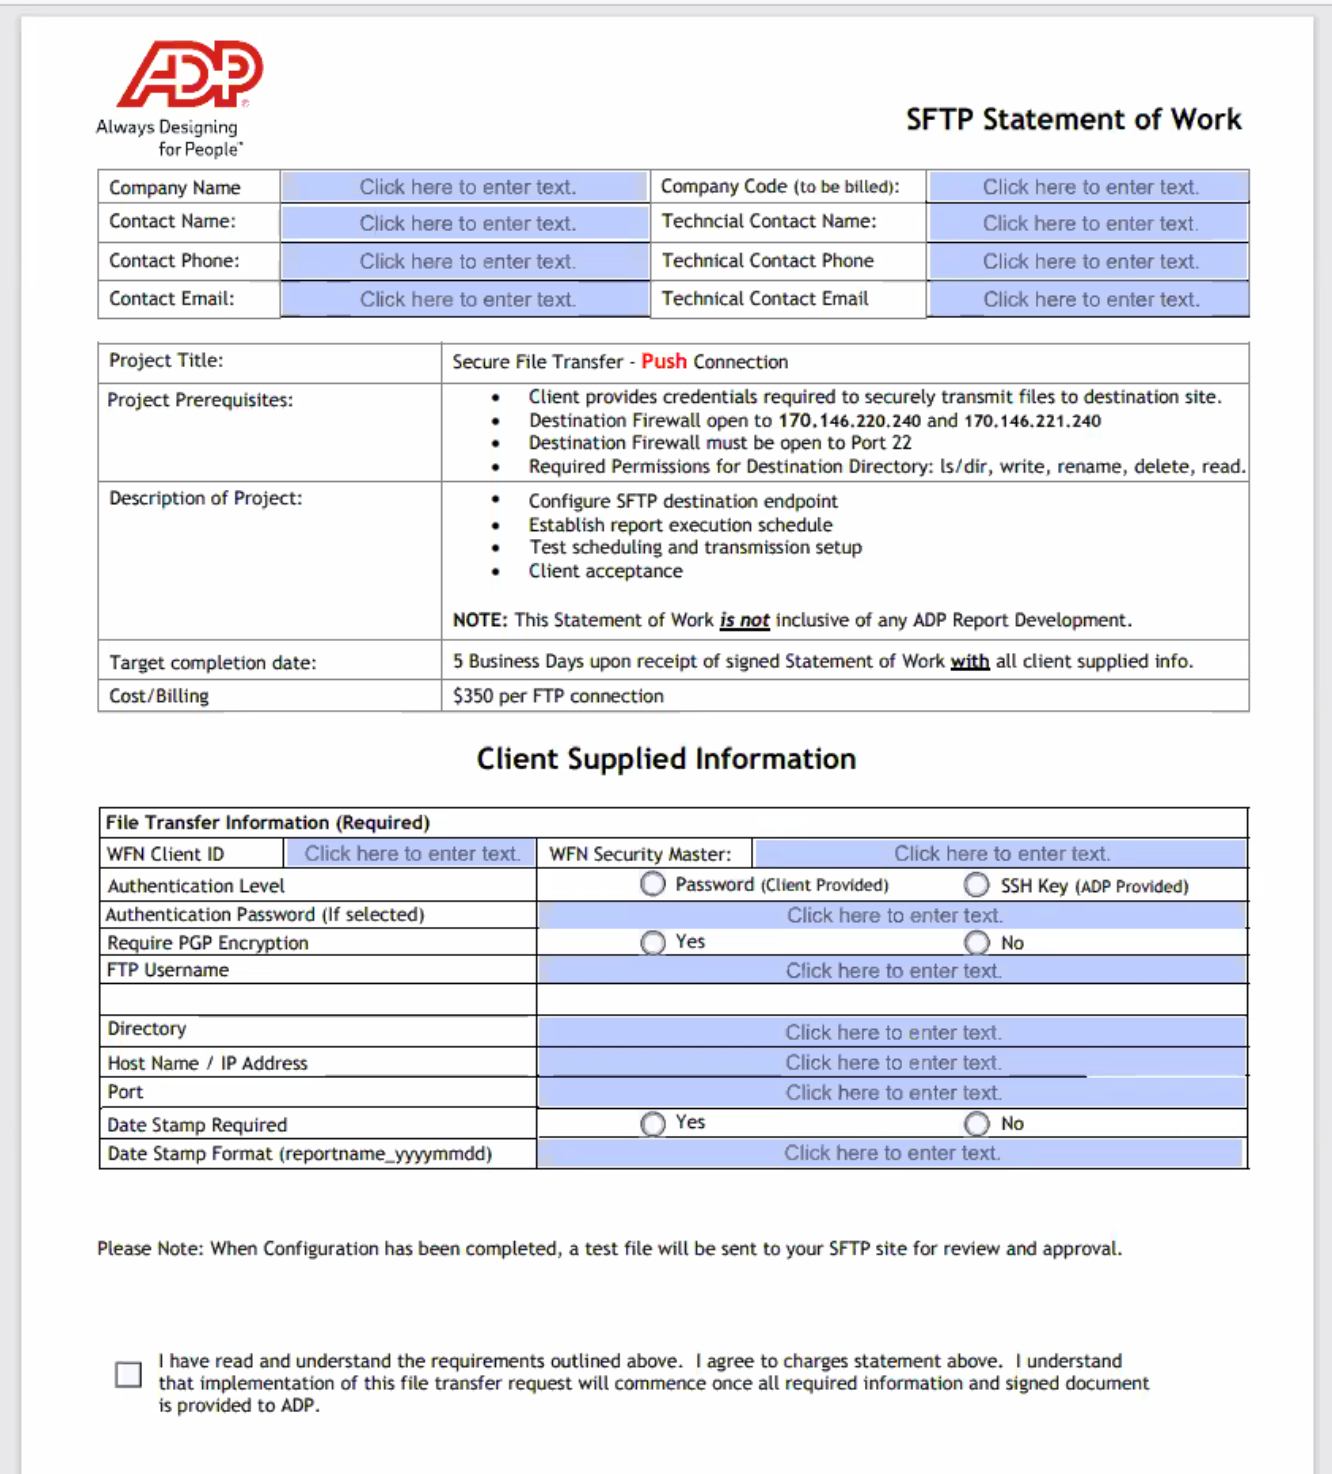
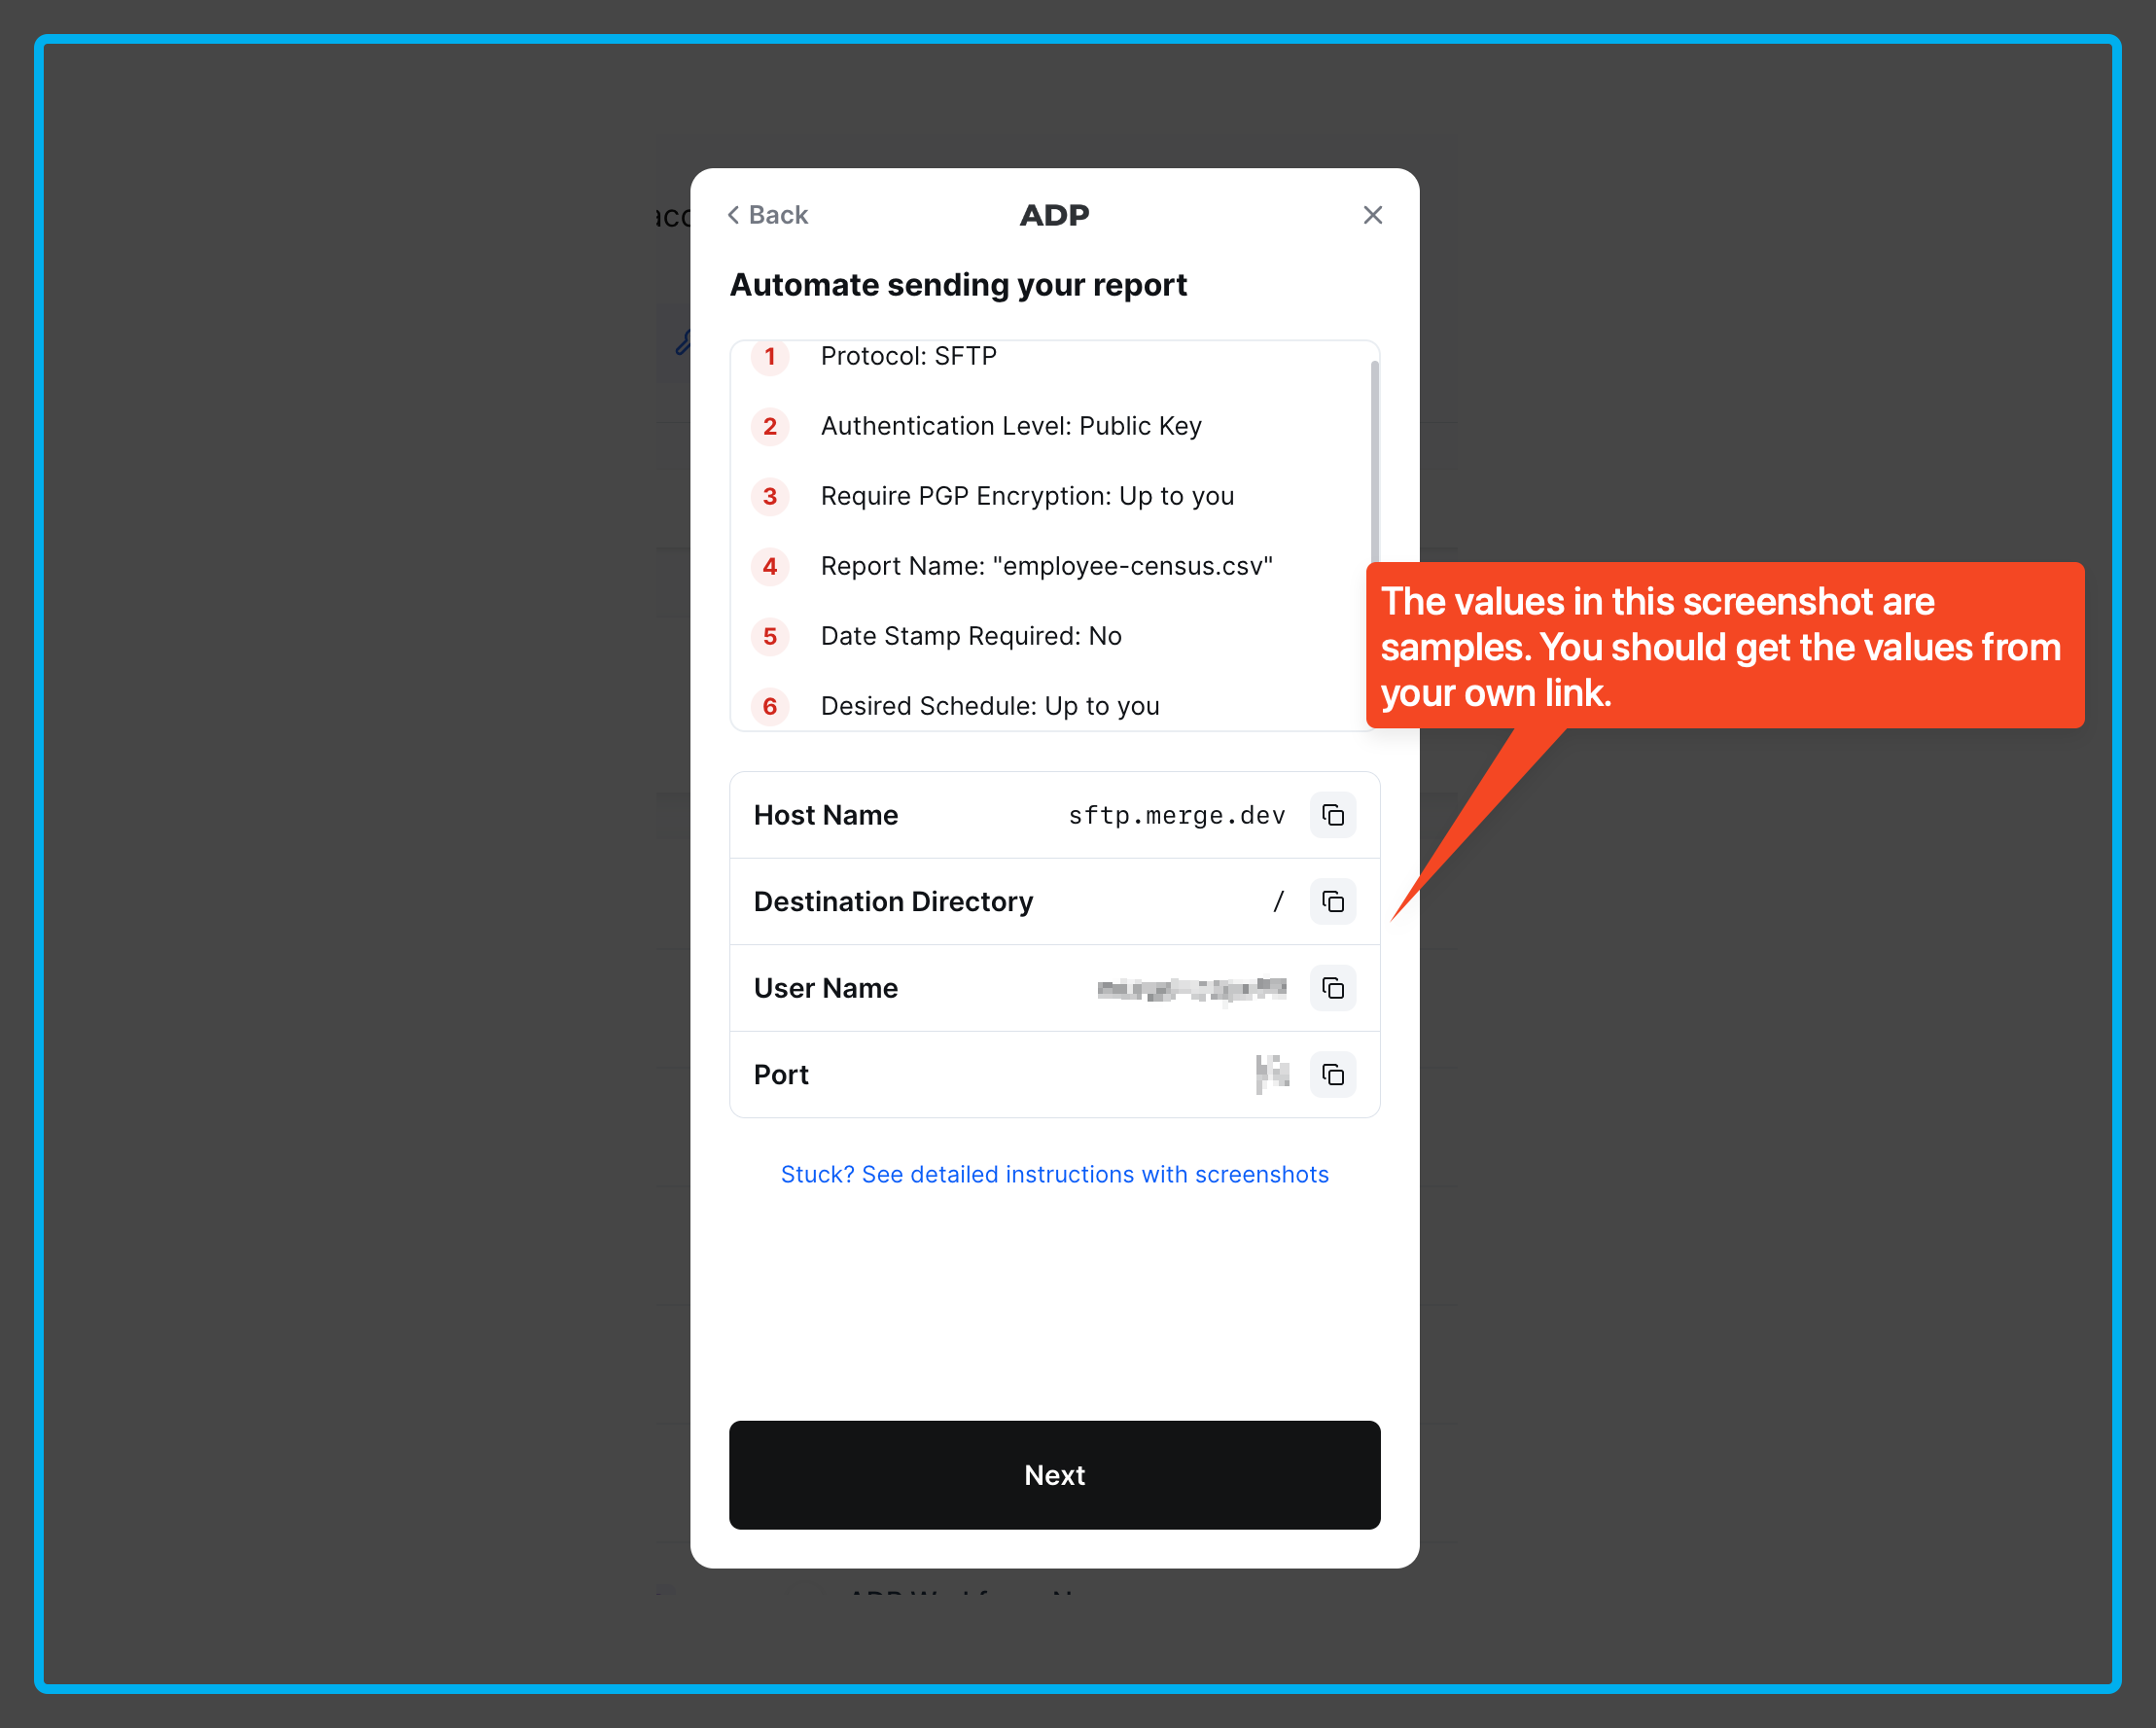
How to fill out the SOW:
- Please fill out the fields in Client Supplied Information:
- WFN Client ID: the characters to the right of the @ symbol in your ADP login name
- WFN Security Master: the person you chose as the Security Master in your ADP instance; this is likely your ADP Admin
- Authentication Level: SSH Key (ADP Provided)
- Date Stamp Required: No
- Require PGP Encryption: Either option is acceptable, depending on your preferences. If you require PGP encryption, your vendor will supply you with a PGP key, which you can then share with ADP.
- You will find all other required information for the Statement of Work in your linking modal:
- FTP Username
- Directory
- Host Name
- Port
Once the SOW is completed, ADP will typically respond within 3-4 weeks with confirmation of when the report is scheduled and the required SSH Key to authenticate the connection.
Scheduling the report:
ADP may schedule the reports themselves based on your preferences, but if you would prefer to schedule the report:
-
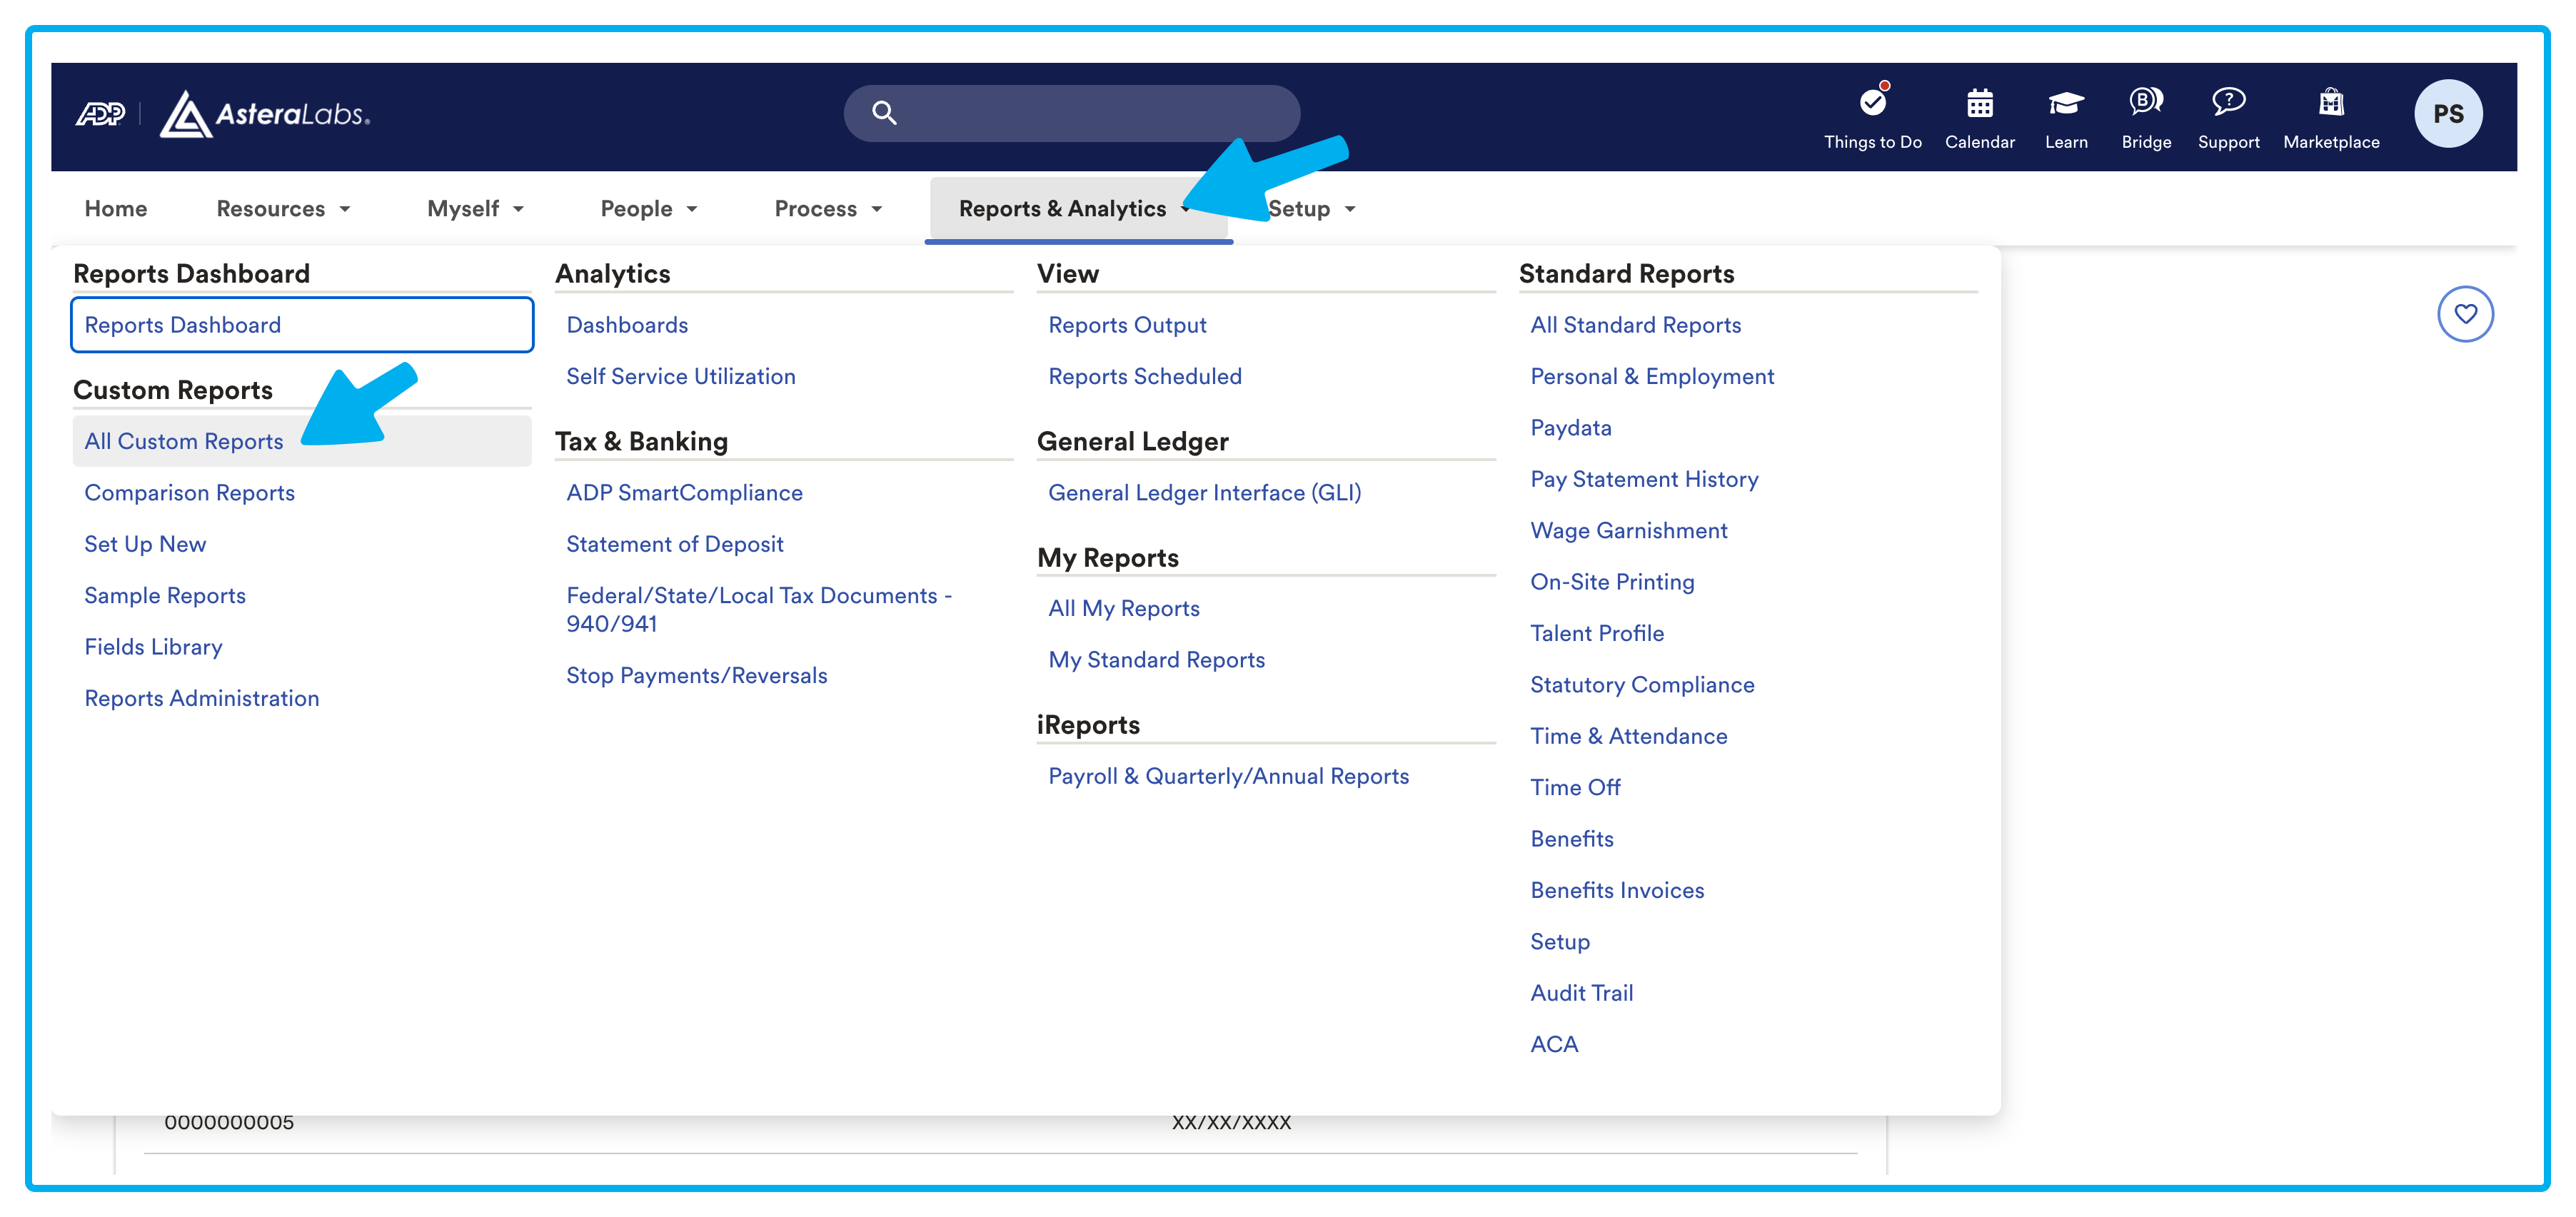
Head over to Report & Analytics > All Custom Reports.
-
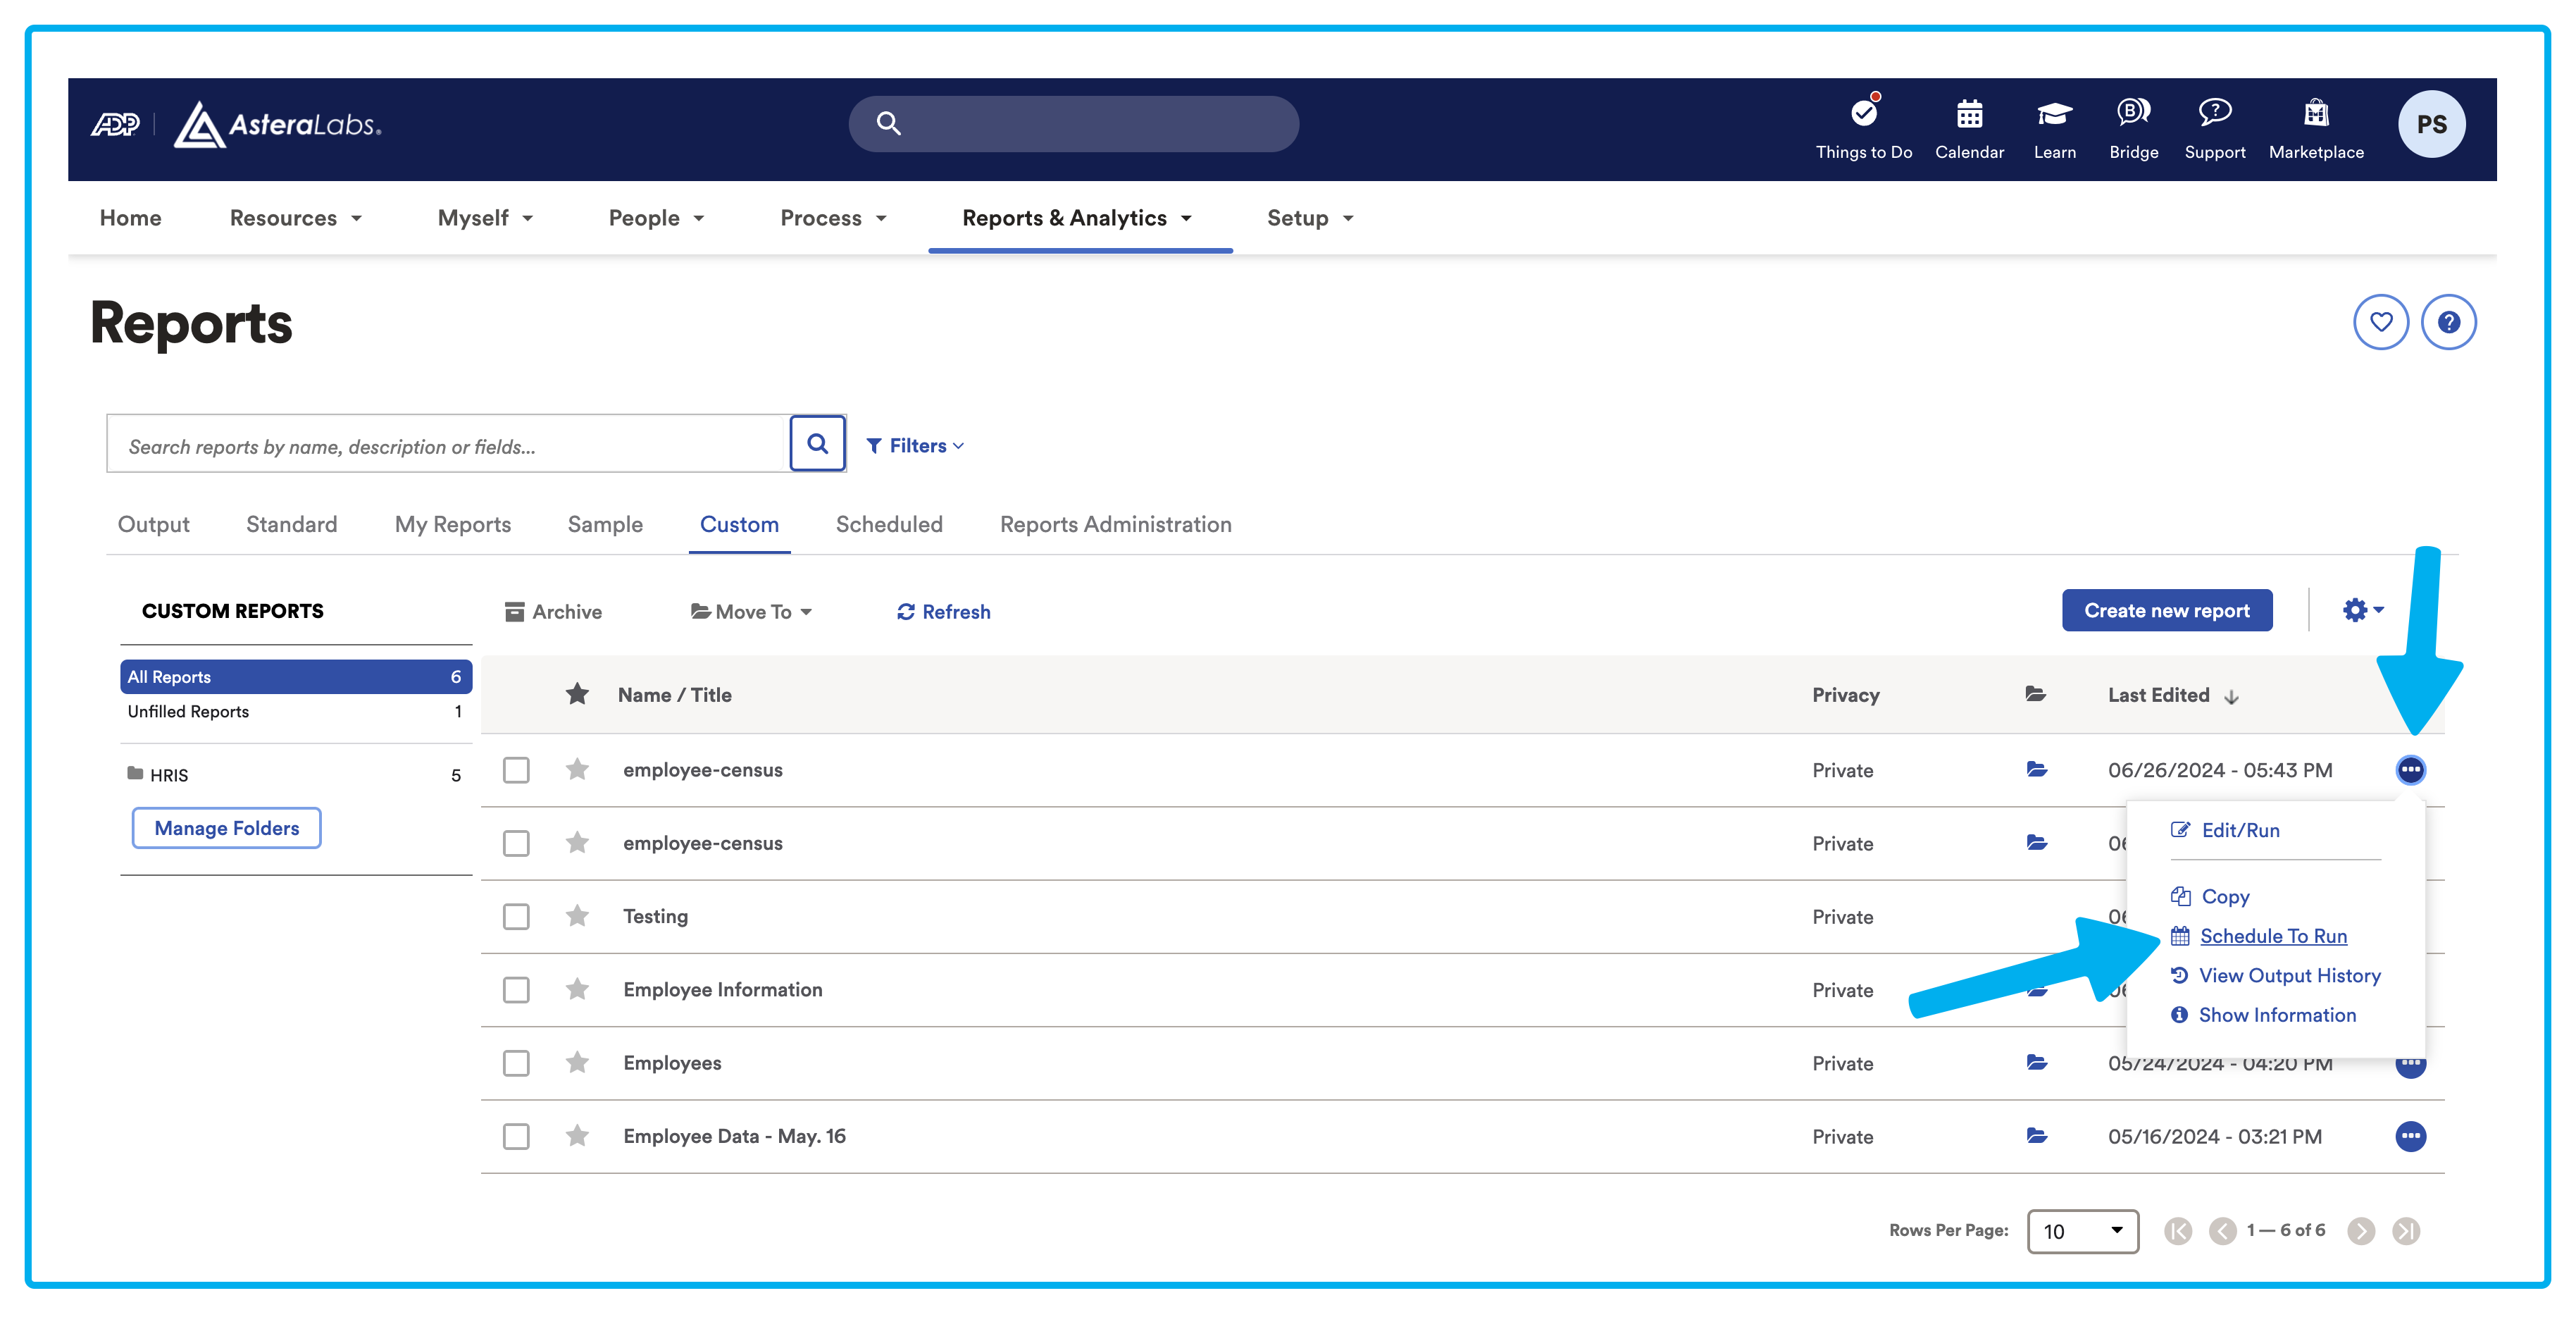
From the Reports main page, find the custom report you configured and open its menu. Then select Schedule To Run.
-
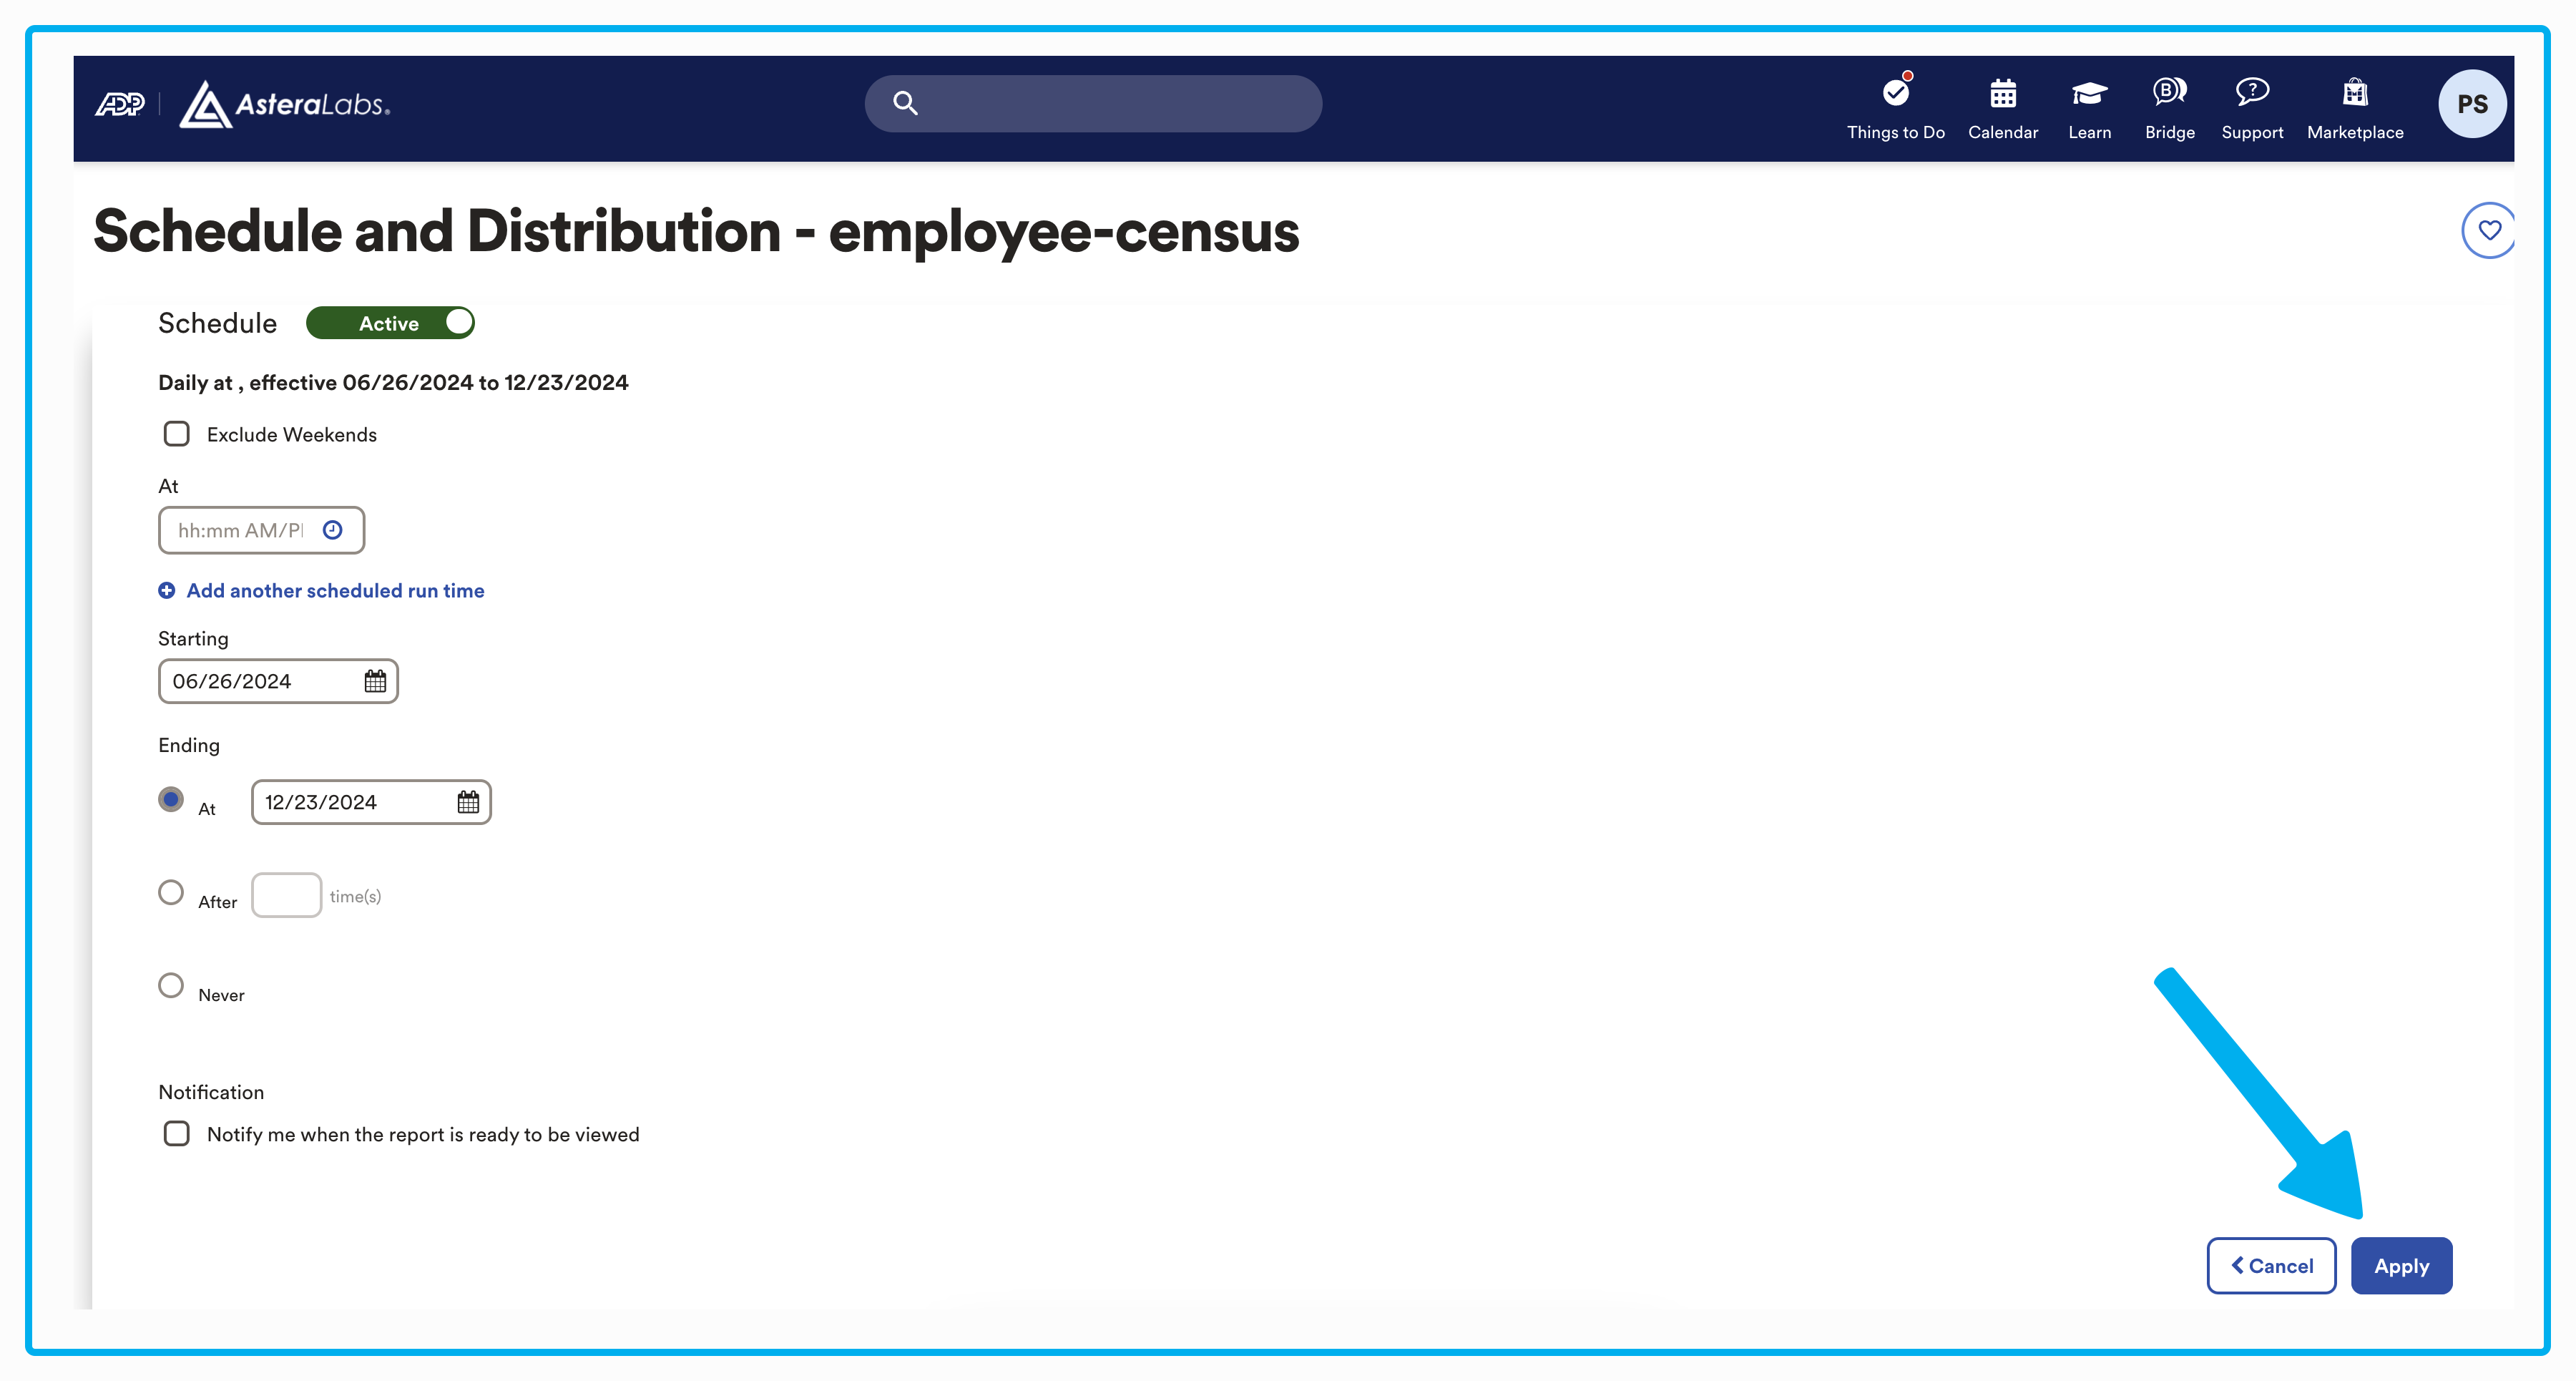
You'll then be in the Schedule and Distribution page. From here, you are able to set up a recurring schedule for when your report will be sent. When you're ready, click Apply.
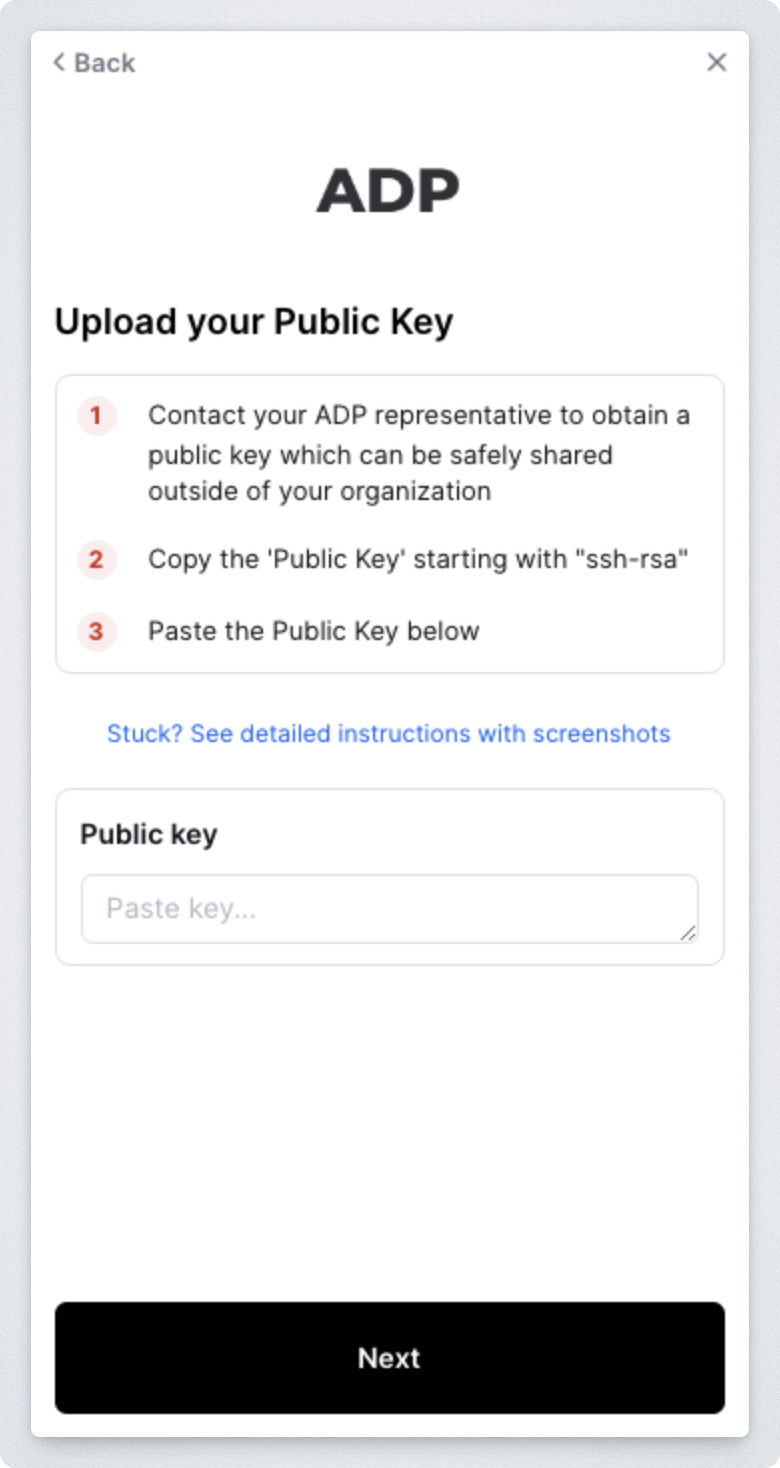
Authorizing the Connection via SSH Key:
Required: ADP will then provide you with an SSH Key, which you will need to input into the linking flow:
Once the connection is established, we will verify that the report is properly formatted. From there, your data will be synced according to the schedule you configured in ADP!
Troubleshooting
If you are having difficulties sending or receiving the data, please first check the following common requirements.
- Your report name must be exactly "Employee-Census.csv or "Employee_Census.csv"
- Your report must have the required columns according to the SFTP Report Template
- Your report must be in .csv format
Note: We accept files up to 250MB. Please message your support representative if you need to increase this limit.