All data requests we make to Workday are SOAP requests, except for Time Off data. Workday only supports the full breadth of Time Off data through their REST API, which requires a different set of credentials (OAuth).
Follow our main Workday guide
With one minor difference: this section instructs you to enable Get access to the list of domains. To access Time Off data, you will need both Get and View access to the Time Off domains.
Here is the set of domains you will need enabled:
| Operation | Domain Security Policy |
|---|---|
| Get Only | Worker Data: Current Staffing Information |
| Get Only | Worker Data: Public Worker Reports |
| View Only | Worker Data: Public Worker Reports |
| Get Only | Worker Data: Time Off |
| View Only | Worker Data: Time Off |
| Get Only | Worker Data: Time Off (Time Off) |
| View Only | Worker Data: Time Off (Time Off) |
| Get Only | Worker Data: Time Off (Time Off Balances Manager View) |
| View Only | Worker Data: Time Off (Time Off Balances Manager View) |
| Get Only | Worker Data: Time Off (Time Off Balances) |
| View Only | Worker Data: Time Off (Time Off Balances) |
| Get Only | Worker Data: Time Off (Time Off Manager View) |
| View Only | Worker Data: Time Off (Time Off Manager View) |
Once you have finished the main guide, the steps below will help you create an API Client to access the Time Off data.
Create a new API Client for Integrations
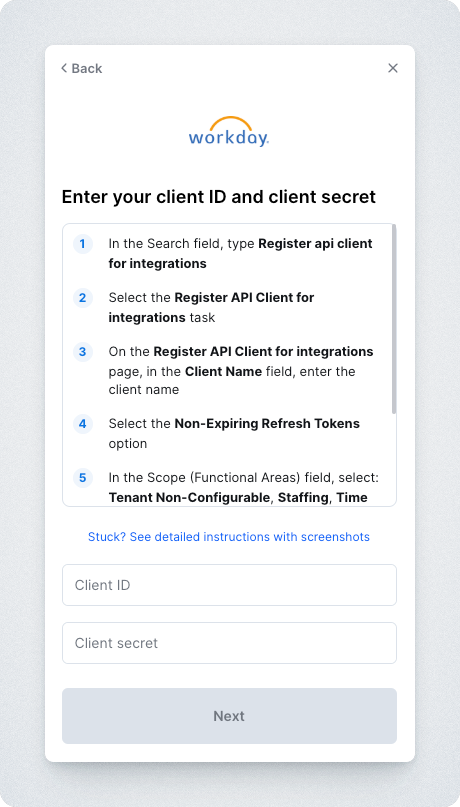
- In the Search field, type Register api client for integrations
- Select the Register API Client for integrations task
- On the Register API client for Integrations page, in the Client Name field, enter any name for your API client
- Select the Non-Expiring Refresh Tokens option
- In the Scope (Functional Areas) field, select:
- Tenant Non-Configurable
- Staffing
- Time Off and Leave
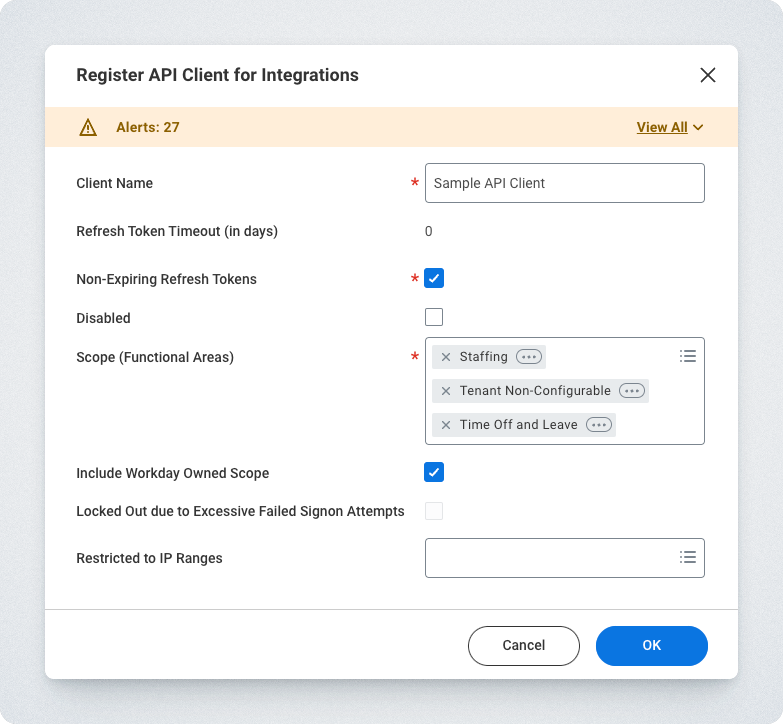
- Click OK; the client ID and client secret are displayed
- Save the Client Secret and Client ID
- Click Done
- Enter the Client Secret and Client ID into the linking flow
Generate a non-expiring Refresh Token
- In the Search field, type View API client
- Select the View API Clients task
- On the View API Clients page, click the API Clients for Integrations tab
- Click the client you created in Create a new API Client for Integrations
- Click API Client > Manage Refresh Tokens for Integrations
- On the Manage Refresh Tokens for Integrations page, in the Workday Account field, enter the Workday account of a user who has access to the custom report. Set up the user as a service account rather than an actual Workday user to prevent permissions from being revoked due to a job change.
- Click OK
- Return to the Workday home page
- In the Search field, type Register api client for integration
- On the Delete or Regenerate Refresh Token page, select the Generate New Refresh Token option
- Click OK
- On the Successfully Regenerated Refresh Token Page, copy the refresh token
- Click Done
- Add the Refresh Token to the linking flow
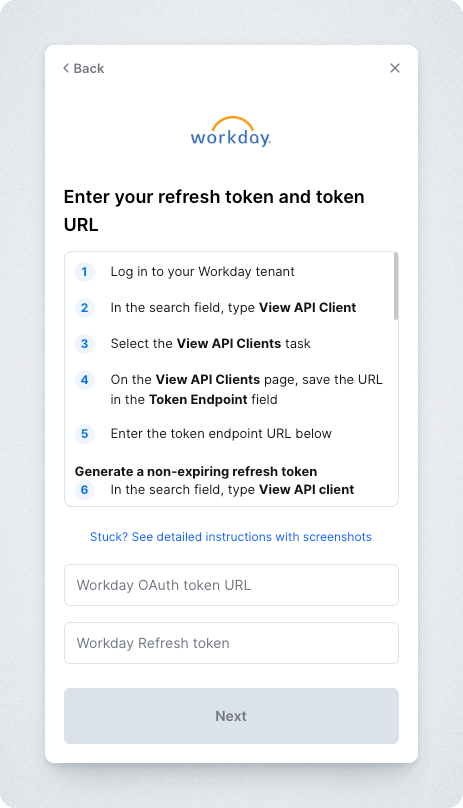
Find your Token Endpoint URL
- Log in to the Workday tenant
- In the Search field, type View API Client
- Select the View API Clients task
- On the View API Clients page, save the URL in the Token Endpoint field
- Add the Workday OAuth Token URL to the linking flow